How to Use ALTAVA Design Lab: Customizing High Quality 3D Clothing
Learn how to create high-quality outfits in the Design Lab using textures, AI-generated patterns, and stickers.
By. ALTAVA
May 21, 2025
Have you ever felt that AI-generated outfits seem unfinished — like they were missing texture, depth, or that final designer’s touch? By redesigning AI-generated outfits in the Design Lab, you can upgrade them into more polished, high-quality creations. Add textures, details, and even your initials to your creations. This tutorial focuses on using the Design Lab’s features to create high-quality 3D clothing.
Entering Design Lab
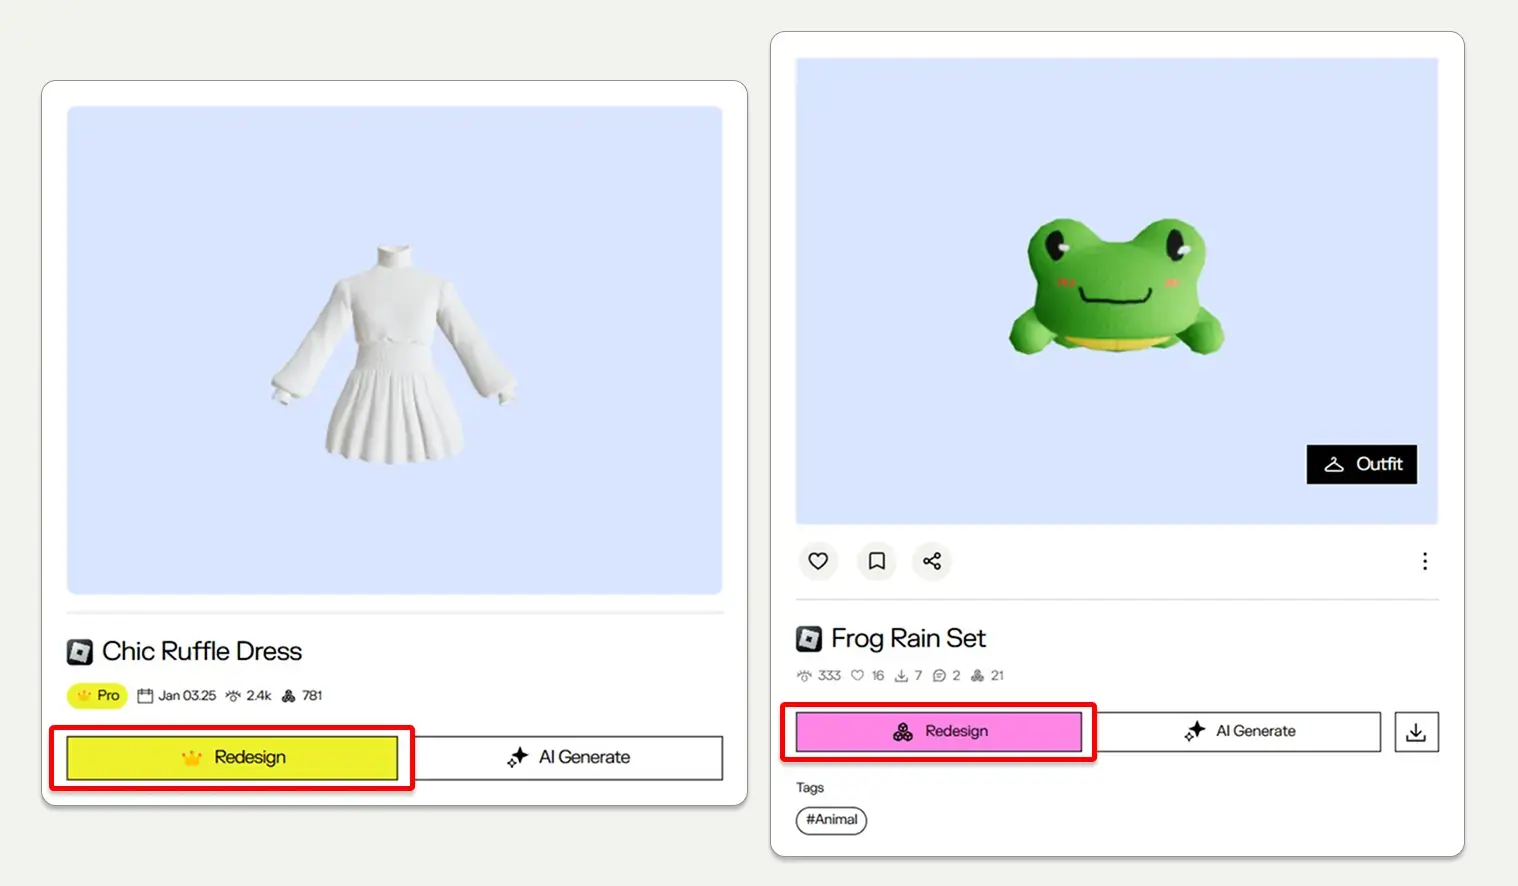
To enter the Design Lab, you can start from a blank template in the Design Studio, or by redesigning an existing outfit.
*Please note that most advanced features are unavailable on mobile devices. For full access, we recommend using a PC.
🧱
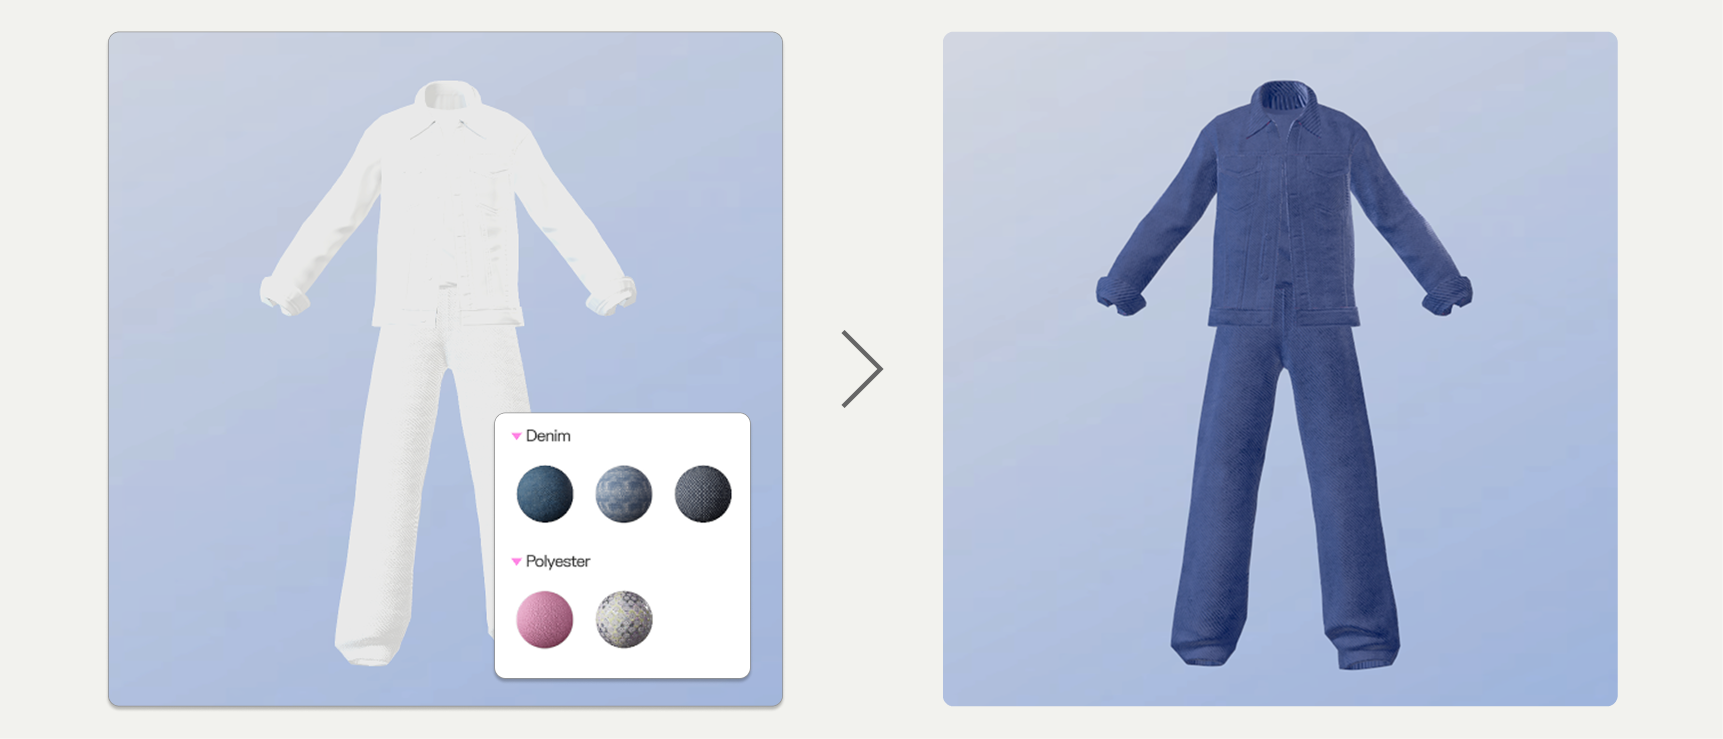
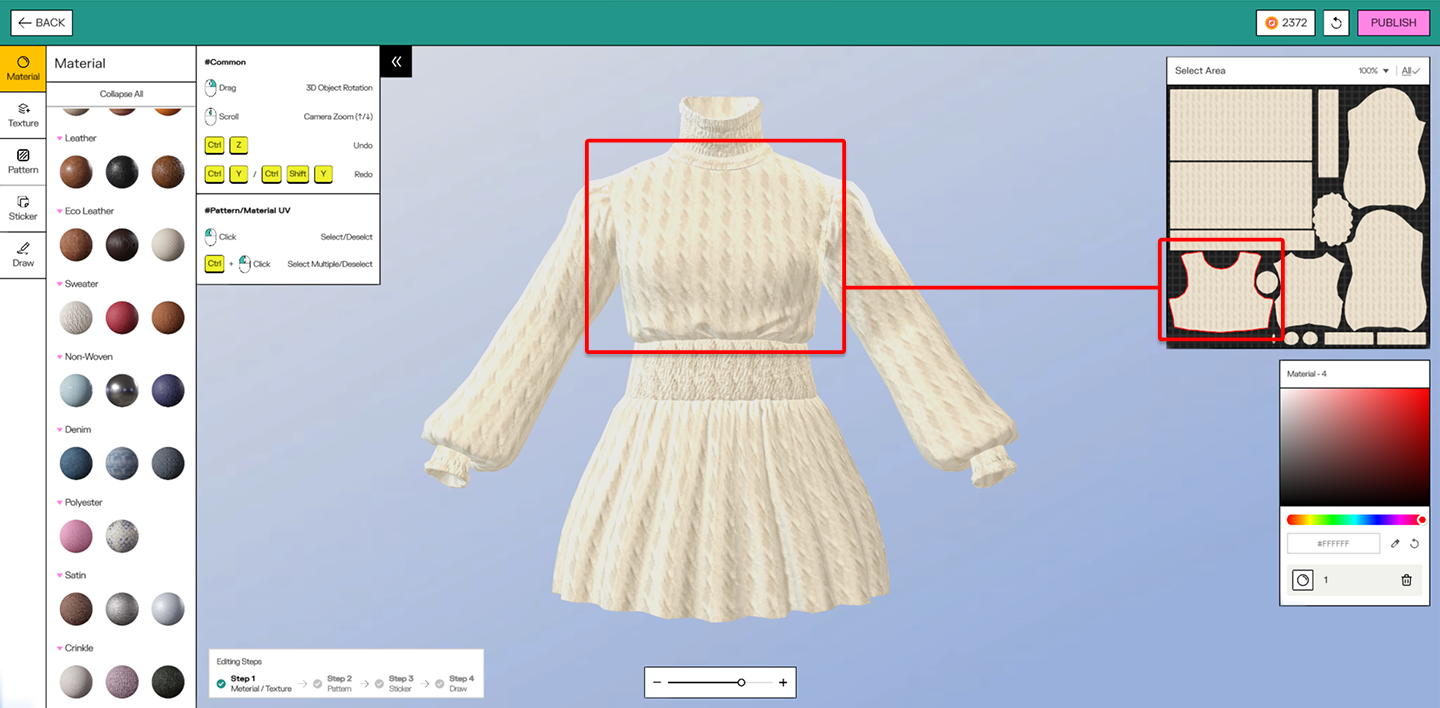
Material
You can choose the material type and color of your clothing. You can also use different materials for each part of the clothing.
To change the material, select the specific area on the UV map on the right. When you click a part of the UV map, the corresponding area on the 3D clothing will glow pink for a moment.
🎨
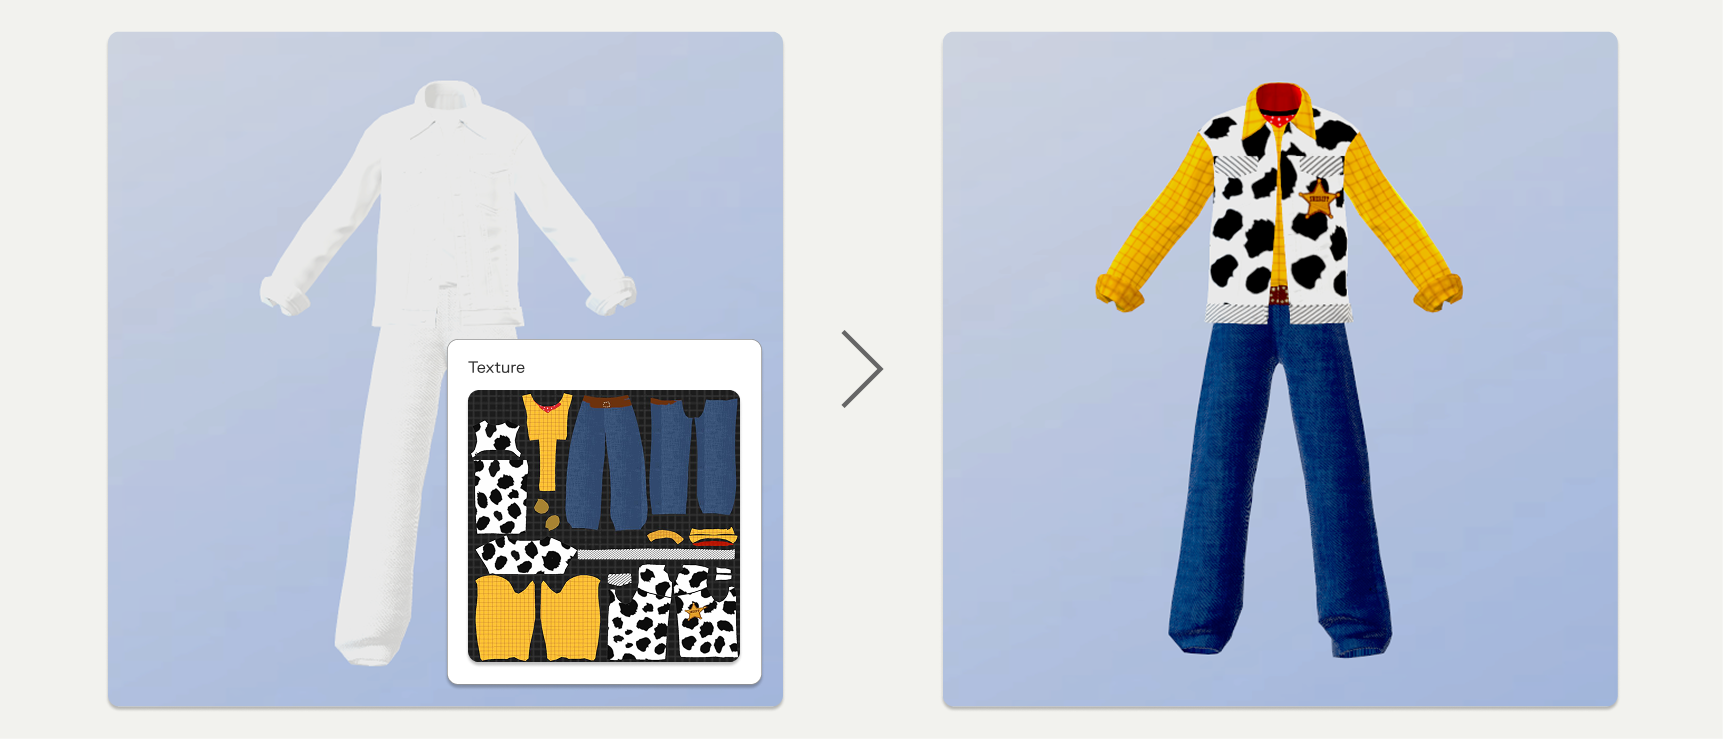
Texture
You can download the UV map of the 3D clothing and customize the texture as you like.
Use 2D editing tools such as Adobe Photoshop or other similar software.
⚠️ Do not change the image resolution or file extension.
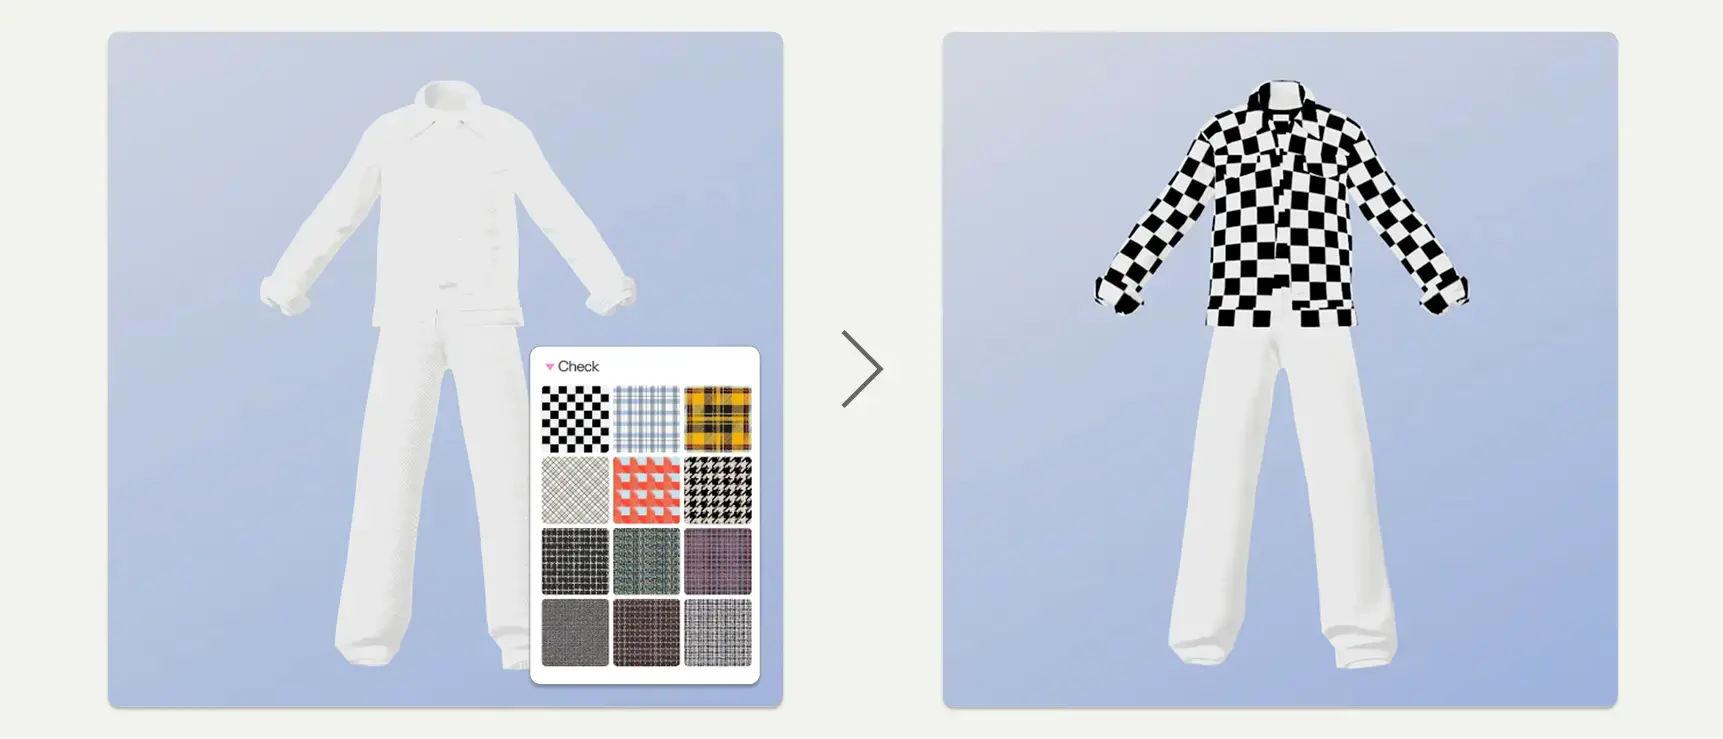
Pattern
You can add patterns to your clothing using the basic patterns available in the Design Lab. You can also upload your own pattern image or generate a new pattern with AI.
Uploading pattern
Select the area you want to update, then click Upload and choose an image file
The image must be a square(1:1) PNG or JPG file under 1MB
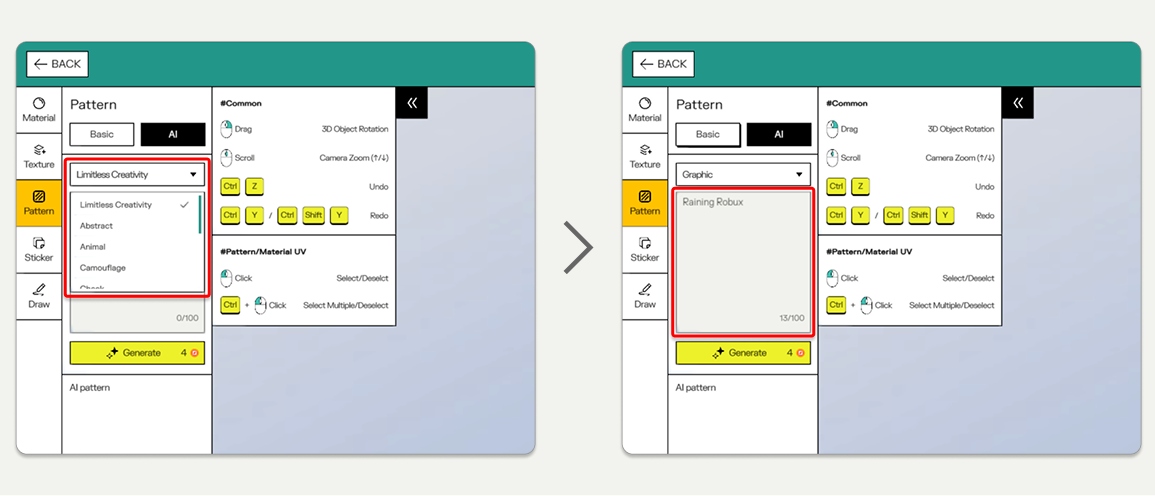
AI pattern
Select the type of pattern you want—such as check, floral, or geometric.If you're looking for something more unique, we recommend trying "Limitless Creativity.Then, describe the pattern you have in mind.
Generating a pattern with AI costs 4 credits each time, but once a pattern is saved, you can reuse it when designing other clothing
You can customize the pattern's color, position, size, and rotation.
🖼️
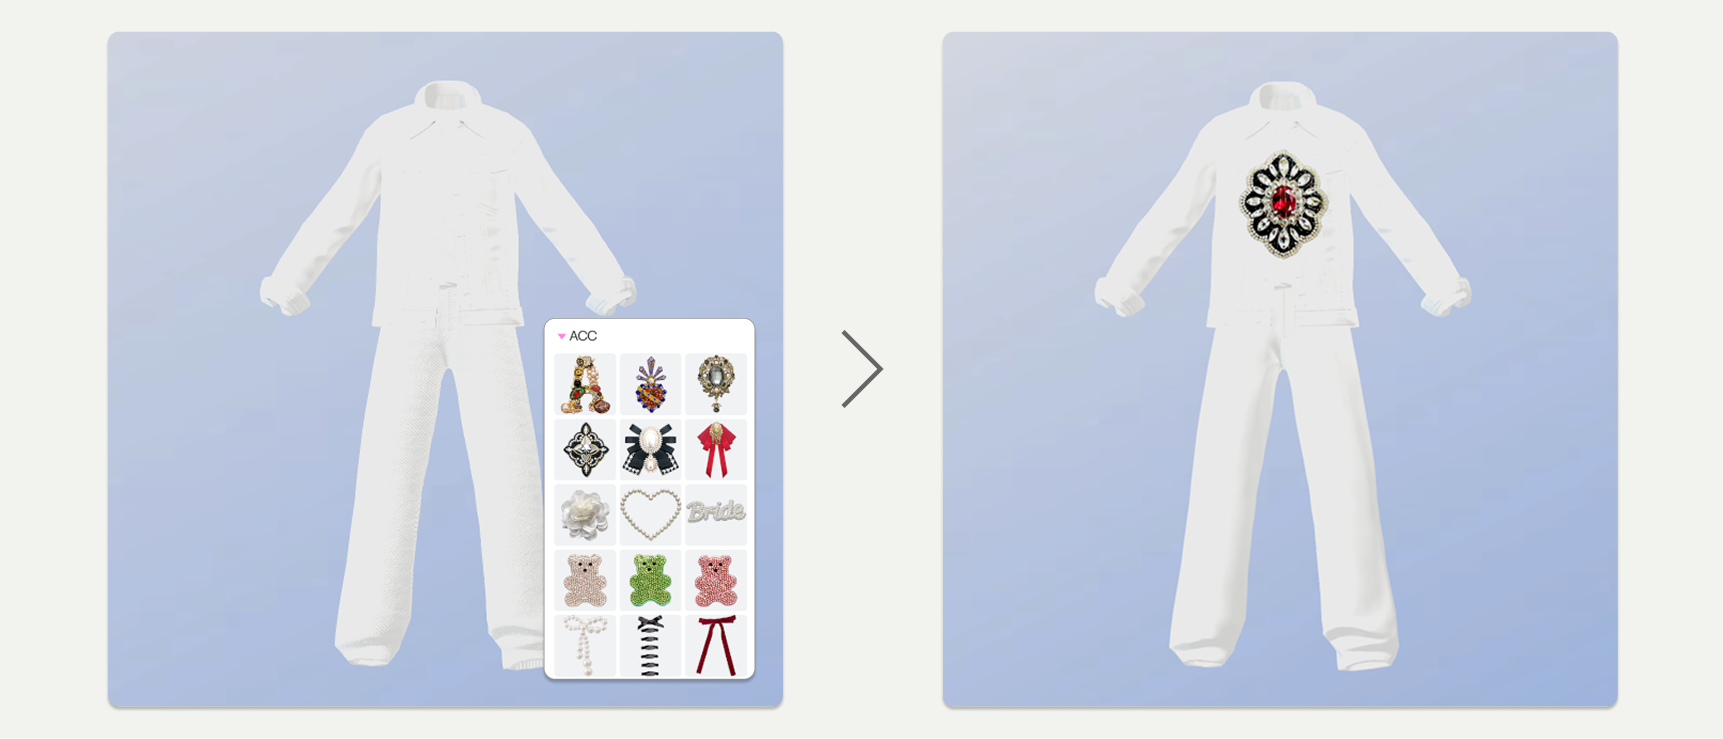
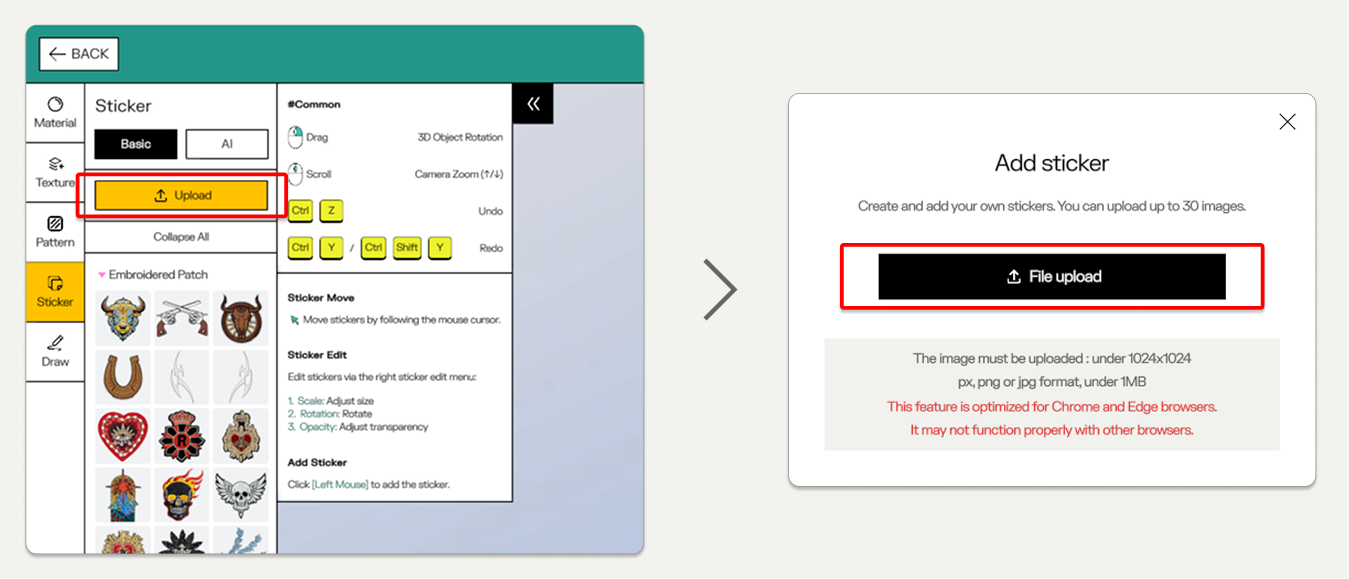
Sticker
You can add stickers to your clothing using the basic stickers available in the Design Lab. You can also upload your own sticker image or generate a new stickers with AI.
Uploading sticker
Click Upload and choose an image file
The image must be a PNG or JPG file under 1MB and no larger than 1024×1024 pixels
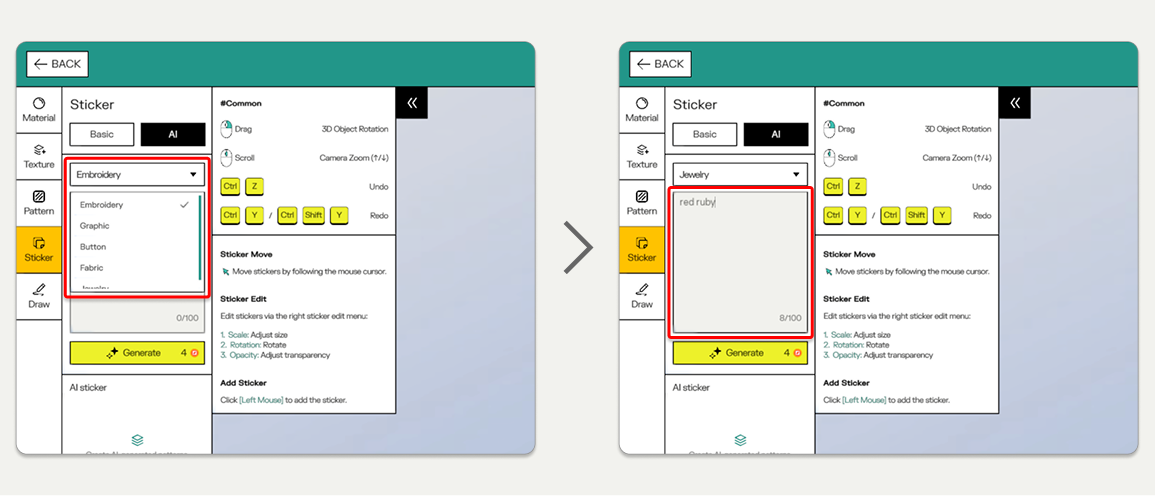
AI pattern
Select the type of sticker you want—such as button, fabric, or jewelry. Then, describe the sticker you have in mind.
Generating a sticker with AI costs 4 credits each time, but once a sticker is saved, you can reuse it when designing other clothing
Choose the sticker you want, position it where you'd like, and click to place it. You can also customize the sticker's color, opacity, size, and rotation. Make your initials into an image and leave your signature on every masterpiece you design.
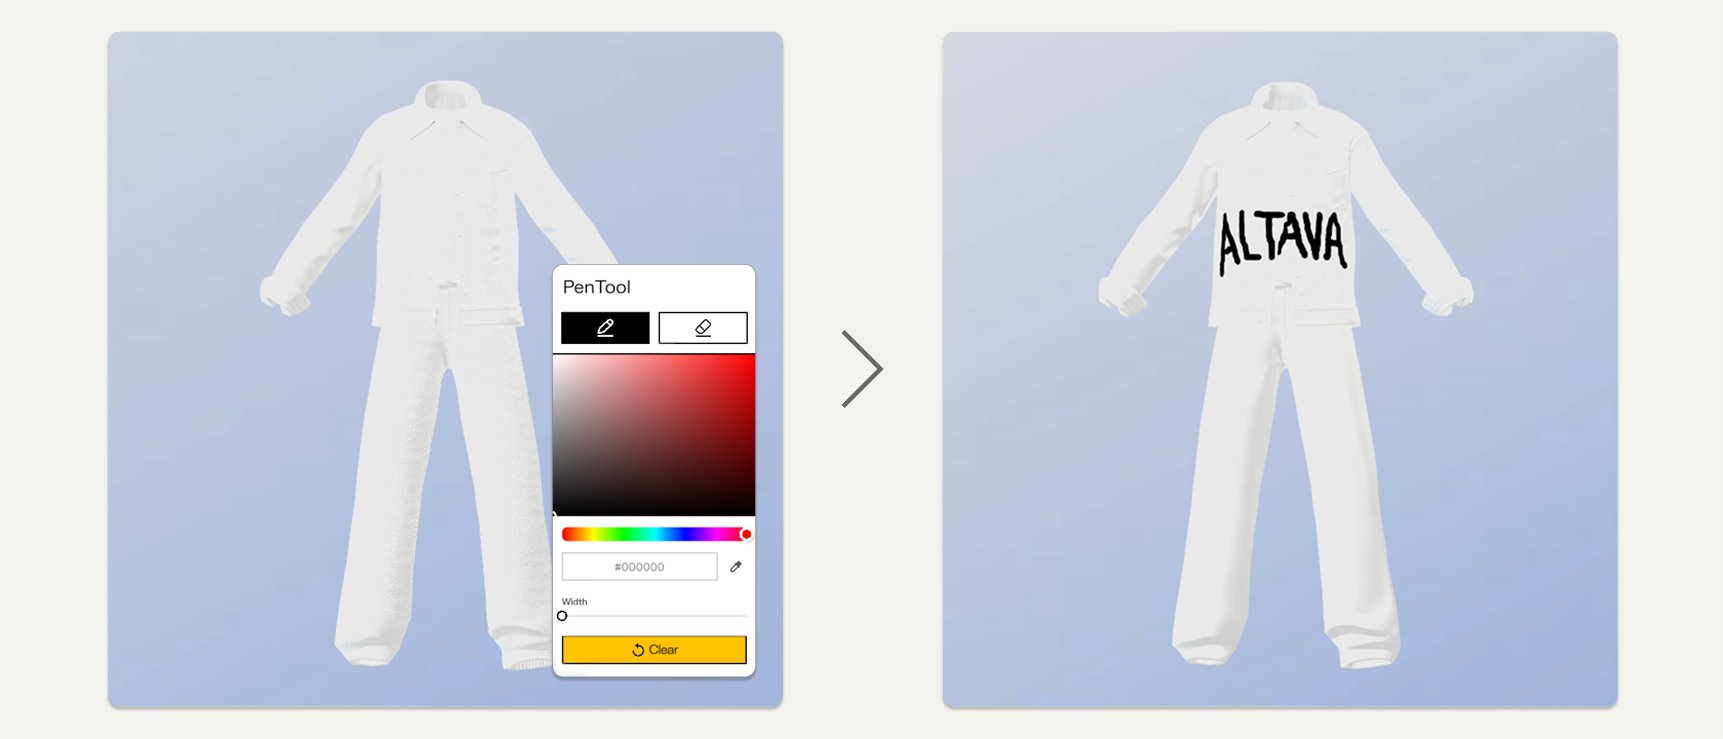
✏️
Drawing Tool
Use the pen tool to write or draw anything you like. You can customize the color and pen width.
You can use the pen tool directly on the 3D clothing, or draw on the 2D canvas instead.
The Design Lab gives you the freedom to craft clothing that reflects your creativity and style. Use its features to fine-tune every detail and turn your vision into high-quality designs that stand out.