Snapchat Lens Studio Guide: Wear Your 3D Clothes
Learn how to upload your clothes to Snapchat lens, bring your imagination into the virtual world!
Note: This article is a tutorial for making a Snapchat Lens (Snapchat AR filter) with your clothing design. The process of making a Snapchat Lens with your Headwear may differ.
✔️
Before you begin, please make sure that
1️⃣ : Install the Lens Studio on your desktop. (Click to download Lens Studio)
2️⃣ : Download the design you want to upload to Snapchat - you must have a FBX file of the clothing design. Please make sure the design you’ve downloaded is for Snapchat.
Step 1: Adding clothing design to Snapchat Lens
Firstly, you must add your clothing to the Lens and sync it with movements using body tracking. Use the preview video to check the size, position, and orientation of the outfit in your Lens and make sure everything works correctly.
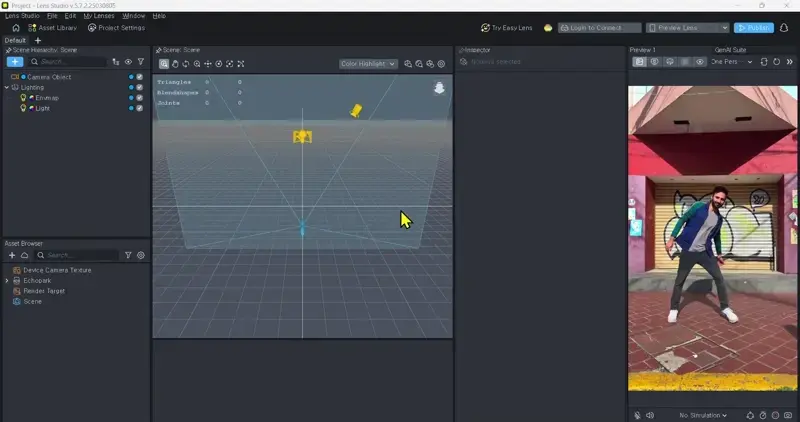
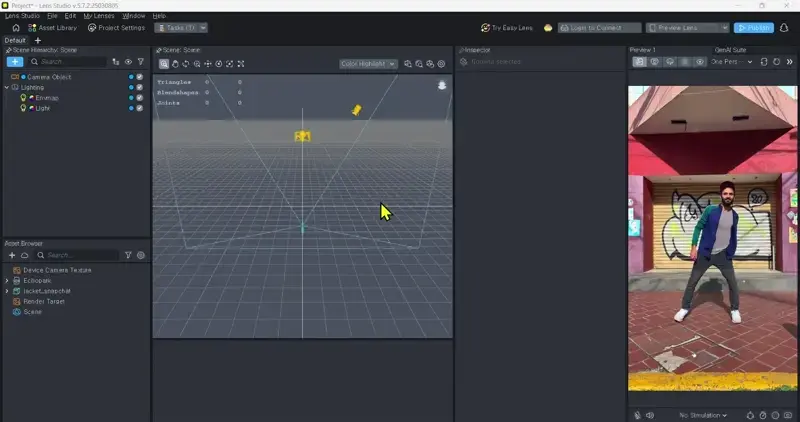
- Import the downloaded clothing file to [Asset Browser], check the import setting and click ‘Accept’.
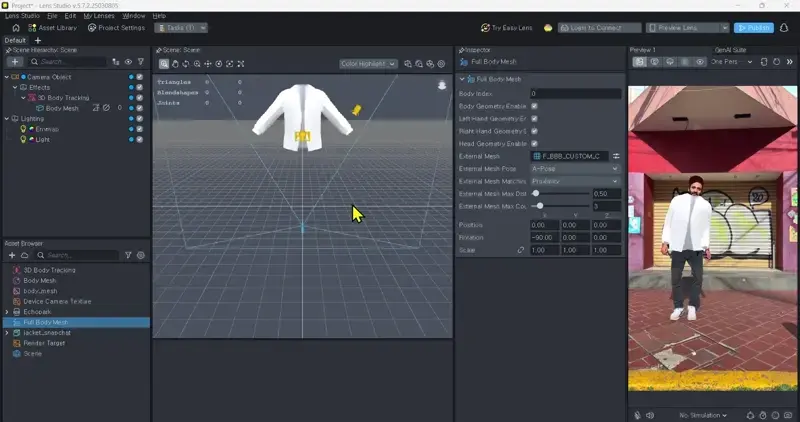
- In [Scene Hierarchy: Scene], add a [Full Body Mesh]
- In [Asset Browser], select [Full Body Mesh]
- At the [Inspector], change the [External Mesh Pose] to [A-Pose]
- Change the [External Mesh] to your clothing’s mesh.
- Check if the clothing is properly positioned and sized correctly.
- If you need to adjust the size or positioning, adjust the X, Y, and Z axes of Position, Rotation, and Scale. (Ex. If the clothing is lying forward, set Rotation X axes to -90.)
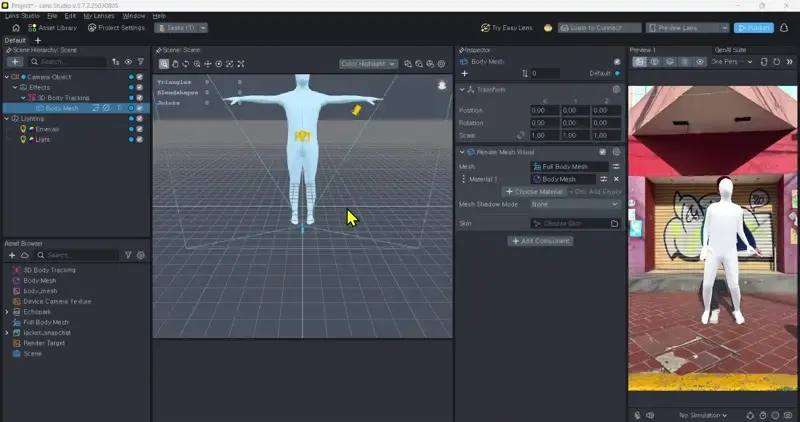
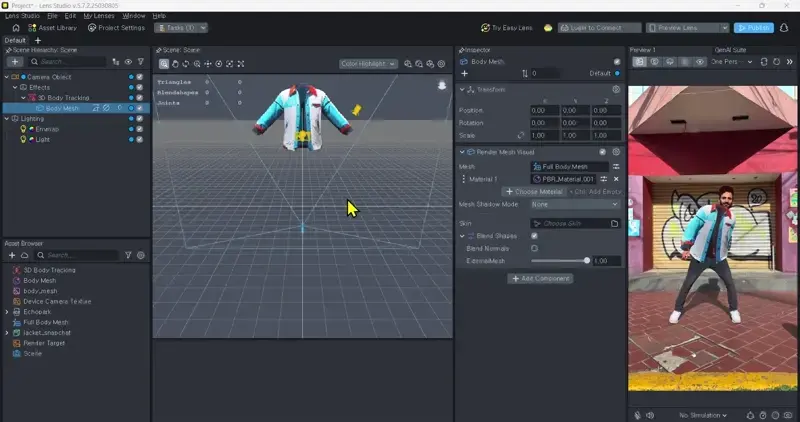
- In [Scene Hierarchy: Scene], select [Body Mesh]
- At the [Inspector] > [Render Mesh Visual], change the [Material] to your clothing’s material
Step 2: Adding an Occluder to your lens
The Occluder will make your Lens more realistic. An occluder hides objects behind it, making virtual elements blend naturally by preventing them from being visible through other surfaces.
- In [Scene Hierarchy: Scene], select [3D Body Tracking] and add a [Capsule] into it. [Capsule] must be parented to [3D Body Tracking].
*Note: You can add any 3D object besides [Capsules], except [Face Mesh], [Full Body Mesh], [Head Mesh], [Upper Body Mesh], and [Text 3D].
- In [Asset Browser], add [Full Body Mesh] and [Occluder].
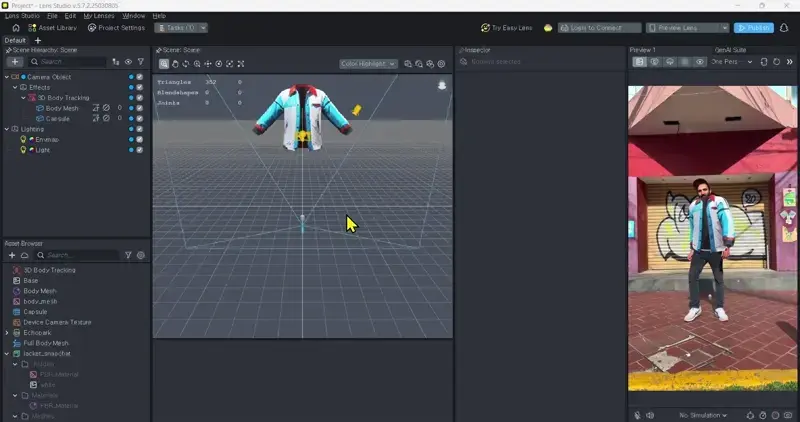
- In [Scene Hierarchy: Scene], select [Capsule]
- At the [Inspector] > [Render Mesh Visual], change the [Mesh] to [Full body Mesh 2]
- At the [Inspector] > [Render Mesh Visual], change the [Material] to [Occluder]
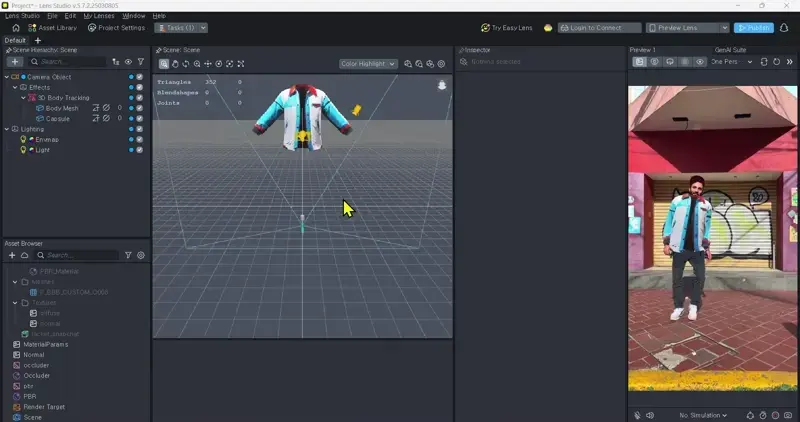
- Check if the occluder is properly positioned and sized correctly. Also, make sure [Capsule] is parented to [3D Body Tracking].
- If you need to adjust the size or positioning, adjust the X, Y, and Z axes of Position, Rotation, and Scale. (Ex. If the size of the [Added 3D object] differs with [Body Mesh], set the size same as it - Scale X: 1.0 Y: 1.0 Z: 1.0)
Step 3: Publishing Lens
Publish your Snapchat Lens and share it with your friends!
Now you're ready to publish your Lens! Just click the [Publish] button in the top right, add a Lens icon, name, and thumbnail, and you're ready to go! You can even generate the Lens icon easily with AI!
- Try adding more effects to your Lens!
- You can link your Snapchat account to Lens Studio to preview your Lens on your device and test it yourself.
✅ Having Trouble? Check If Your Lens Isn’t Working as Expected
- Is the design you’ve downloaded for Snapchat?
- Did you check the clothing and occluder’s position, rotation, or scales?
- Did you insert the correct Mesh and Materials?
- Make sure you’re not getting confused because the assets in [Scene Hierarchy: Scene] and [Asset Browser] have the same names! Make sure to follow the guide exactly as shown!